In this tutorial, we will see cacti installation and configuration on CentOS 7 and RHEL 7. We will also know what is cacti? So let’s start.
What is Cacti?
Cacti is an open source web based network monitoring and system monitoring graphing tool. Its enables a user to poll services at regular intervals and create graphs on resulting data using RRDtool. We use cacti as a graph time-series data of metrics such as network bandwidth utilization, CPU load, running processes, disk space etc.
Mandatory Required Packages for Cacti
These packages we need to be install on our CentOS 7 and RHEL 7 for Cacti installation.
- Apache :- Web server to display network graphs created by PHP and RRDTool.
- MySQL :- Database server is used to be store cacti information.
- PHP :- A script module to create graphs using RRDTool.
- PHP-SNMP :- PHP extension for SNMP to access data.
- NET-SNMP :- SNMP (Simple Network Management Protocol) is used to manage network.
- RRDTool :- A database tool to manage and retrieve time series data like CPU load, Network Bandwidth etc.
Start Installing Cacti Required Packages on RHEL 7 and CentOS 7
First, we need to install following dependency packages one-by-one using YUM package manager tool.
Apache installation using yum
[root@cacti ~]# yum –y install httpd httpd-devel
MySQL installation using yum
Red Hat makes a new transaction from MySql to MariaDB, as MariaDB is the default implementation of MySQL in RHEL7 and CentOS 7. So let’s start MariaDB on CentOS 7
[root@cacti ~]# yum -y install mariadb-server
PHP installation using yum
[root@cacti ~]# yum -y install php-mysql php-pear php-common php-gd php-devel php php-mbstring php-cli
PHP-SNMP installation using yum
[root@cacti ~]# yum -y install php-snmp
NET-SNMP installation using yum
[root@cacti ~]# yum -y install net-snmp-utils net-snmp-libs
RRDTool installation using yum
[root@cacti ~]# yum -y install rrdtool
After installation we need to start Apache, MySQL and SNMP Services
Once we have installed all the required software’s for Cacti installation, let’s start them one-by-one using following commands.
[root@cacti ~]# systemctl start httpd.service
[root@cacti ~]# systemctl start mariadb.service
[root@cacti ~]# systemctl start snmpd.service
[root@cacti ~]#
Configure System Start-up Links
Configuring Apache, MySQL and SNMP Services to start on boot.
[root@cacti ~]# systemctl enable httpd.service
Created symlink from /etc/systemd/system/multi-user.target.wants/httpd.service to /usr/lib/systemd/system/httpd.service.
[root@cacti ~]# systemctl enable mariadb.service
Created symlink from /etc/systemd/system/multi-user.target.wants/mariadb.service to /usr/lib/systemd/system/mariadb.service.
[root@cacti ~]# systemctl enable snmpd.service
Created symlink from /etc/systemd/system/multi-user.target.wants/snmpd.service to /usr/lib/systemd/system/snmpd.service.
[root@cacti ~]#
Check running status of these services
[root@cacti ~]# systemctl status httpd.service
● httpd.service - The Apache HTTP Server
Loaded: loaded (/usr/lib/systemd/system/httpd.service; enabled; vendor preset: disabled)
Active: active (running) since Sat 2018-12-01 10:04:02 CET; 4min 37s ago
Docs: man:httpd(8)
man:apachectl(8)
Main PID: 18074 (httpd)
Status: "Total requests: 0; Current requests/sec: 0; Current traffic: 0 B/sec"
CGroup: /system.slice/httpd.service
├─18074 /usr/sbin/httpd -DFOREGROUND
├─18076 /usr/sbin/httpd -DFOREGROUND
├─18077 /usr/sbin/httpd -DFOREGROUND
├─18078 /usr/sbin/httpd -DFOREGROUND
├─18079 /usr/sbin/httpd -DFOREGROUND
└─18080 /usr/sbin/httpd -DFOREGROUND

Dec 01 10:04:01 cacti systemd[1]: Starting The Apache HTTP Server...
Dec 01 10:04:01 cacti httpd[18074]: AH00558: httpd: Could not reliably determine the server's fully qualified domain name, using fe80::d384:e38a:717d:7c0b...his message
Dec 01 10:04:02 cacti systemd[1]: Started The Apache HTTP Server.
Hint: Some lines were ellipsized, use -l to show in full.
[root@cacti ~]# systemctl status mariadb.service
● mariadb.service - MariaDB database server
Loaded: loaded (/usr/lib/systemd/system/mariadb.service; enabled; vendor preset: disabled)
Active: active (running) since Sat 2018-12-01 10:04:13 CET; 4min 46s ago
Main PID: 18166 (mysqld_safe)
CGroup: /system.slice/mariadb.service
├─18166 /bin/sh /usr/bin/mysqld_safe --basedir=/usr
└─18328 /usr/libexec/mysqld --basedir=/usr --datadir=/var/lib/mysql --plugin-dir=/usr/lib64/mysql/plugin --log-error=/var/log/mariadb/mariadb.log --pid-fi...

Dec 01 10:04:11 cacti mariadb-prepare-db-dir[18087]: MySQL manual for more instructions.
Dec 01 10:04:11 cacti mariadb-prepare-db-dir[18087]: Please report any problems at http://mariadb.org/jira
Dec 01 10:04:11 cacti mariadb-prepare-db-dir[18087]: The latest information about MariaDB is available at http://mariadb.org/.
Dec 01 10:04:11 cacti mariadb-prepare-db-dir[18087]: You can find additional information about the MySQL part at:
Dec 01 10:04:11 cacti mariadb-prepare-db-dir[18087]: http://dev.mysql.com
Dec 01 10:04:11 cacti mariadb-prepare-db-dir[18087]: Consider joining MariaDB's strong and vibrant community:
Dec 01 10:04:11 cacti mariadb-prepare-db-dir[18087]: https://mariadb.org/get-involved/
Dec 01 10:04:11 cacti mysqld_safe[18166]: 181201 10:04:11 mysqld_safe Logging to '/var/log/mariadb/mariadb.log'.
Dec 01 10:04:11 cacti mysqld_safe[18166]: 181201 10:04:11 mysqld_safe Starting mysqld daemon with databases from /var/lib/mysql
Dec 01 10:04:13 cacti systemd[1]: Started MariaDB database server.
[root@cacti ~]# systemctl status snmpd.service
● snmpd.service - Simple Network Management Protocol (SNMP) Daemon.
Loaded: loaded (/usr/lib/systemd/system/snmpd.service; enabled; vendor preset: disabled)
Active: active (running) since Sat 2018-12-01 10:04:22 CET; 4min 56s ago
Main PID: 18369 (snmpd)
CGroup: /system.slice/snmpd.service
└─18369 /usr/sbin/snmpd -LS0-6d -f

Dec 01 10:04:22 cacti systemd[1]: Starting Simple Network Management Protocol (SNMP) Daemon....
Dec 01 10:04:22 cacti snmpd[18369]: NET-SNMP version 5.7.2
Dec 01 10:04:22 cacti systemd[1]: Started Simple Network Management Protocol (SNMP) Daemon..
[root@cacti ~]#
Install Cacti on CentOS 7 and RHEL 7
Before cacti installation we need to install and enable epel repository. We can use below command to install epel and cacti on CentOS 7 and RHEL 7.
[root@cacti ~]# yum -y install epel-release
[root@cacti ~]# yum -y install cacti
MySQL Server configuring for Cacti Installation
We need to configure MySQL for cacti, to do this we need to set password for our newly installed MySQL server and then we will create cacti database with user cactiuser. If you’re MySQL is already password protected, then don’t need to set it again.
Set MySQL Password
To set new password for MySQL server, run the below command.
[root@cacti ~]# mysqladmin -u root password YOUR-PASSWORD
Create MySQL Cacti Database
Login into MySQL server with newly created password and create cacti database with user cactiuser and set the password for it.
[root@cacti ~]# mysql -u root -p
Enter password:
Welcome to the MariaDB monitor. Commands end with ; or \g.
Your MariaDB connection id is 289
Server version: 5.5.60-MariaDB MariaDB Server

Copyright (c) 2000, 2018, Oracle, MariaDB Corporation Ab and others.

Type 'help;' or '\h' for help. Type '\c' to clear the current input statement.

MariaDB [(none)]> create database cacti;
Query OK, 1 row affected (0.00 sec)

MariaDB [(none)]> GRANT ALL ON cacti.* TO cactiuser@localhost IDENTIFIED BY 'cactipassword';
Query OK, 0 rows affected (0.00 sec)

MariaDB [(none)]> GRANT SELECT ON mysql.time_zone_name TO cactiuser@localhost;
Query OK, 0 rows affected (0.00 sec)

MariaDB [(none)]> flush privileges;
Query OK, 0 rows affected (0.00 sec)

MariaDB [(none)]> exit
Bye
[root@cacti ~]#
Need to be import mysql_test_data_timezone.sql
Cactiuser user should have access to the mysql.time_zone_name Table. So we need to import the mysql_test_data_timezone.sql to mysql database first.
[root@cacti ~]# mysql -u root -p mysql < /usr/share/mysql/mysql_test_data_timezone.sql
Enter password:
[root@cacti ~]#
Database Tuning
Cacti recommend changing MySQL variables settings for better performances. So we need to configure this file vi /etc/my.cnf.d/server.cnf depends on our operating system. Like this:-
[mysqld]
collation-server = utf8_general_ci
init-connect='SET NAMES utf8'
character-set-server = utf8
max_heap_table_size = 400M
max_allowed_packet = 16777216
tmp_table_size = 64M
join_buffer_size = 64M
innodb_file_per_table = on
innodb_buffer_pool_size = 2048M
innodb_doublewrite = off
innodb_additional_mem_pool_size = 80M
innodb_lock_wait_timeout = 50
innodb_flush_log_at_trx_commit = 2
Import the default database to the cacti database
We need to install cacti tables into newly created Cacti database, We can use the below command to import database.
[root@cacti ~]# mysql cacti < /usr/share/doc/cacti-*/cacti.sql -u root -p
Enter password:
[root@cacti ~]#
Configure MySQL settings for Cacti
Open the file /usr/share/cacti/include/config.php with any editor and make the following changes and save the file. Make sure you set password correctly.
/* make sure these values reflect your actual database/host/user/password */

$database_type = 'mysql';
$database_default = 'cacti';
$database_hostname = 'localhost';
$database_username = 'cactiuser';
$database_password = 'YOUR-PASSWORD';
$database_port = '3306';
$database_ssl = false;
Firewall configuration for Cacti
[root@cacti ~]# firewall-cmd --permanent --zone=public --add-service=http
success
[root@cacti ~]# firewall-cmd --reload
success
[root@cacti ~]#
Apache Server configuration for Cacti Installation
Open this file /etc/httpd/conf.d/cacti.conf with any editor and enable access to Cacti application for our local network or per IP level.
# vi /etc/httpd/conf.d/cacti.conf

Alias /cacti /usr/share/cacti

<Directory /usr/share/cacti/>
        <IfModule mod_authz_core.c>
                # httpd 2.4
                Require all granted
        </IfModule>
        <IfModule !mod_authz_core.c>
                # httpd 2.2
                Order deny,allow
                Deny from all
                Allow from all
        </IfModule>
</Directory>
Set the timezone for cacti
We need to set the Timezone in this file vi /etc/php.ini like this:-
[Date]
; Defines the default timezone used by the date functions
; http://php.net/date.timezone
date.timezone = Europe/Brussels
Finally, We need to restart the Apache service
[root@cacti ~]# systemctl restart httpd.service
[root@cacti ~]#
Cron setting for Cacti
Open file /etc/cron.d/cacti uncomment the below line. The poller.php script runs every 5mins and collects data of known host which is used by Cacti application to display graphs like below:-
[root@cacti ~]# vi /etc/cron.d/cacti
[root@cacti ~]# cat /etc/cron.d/cacti
*/5 * * * * cacti /usr/bin/php /usr/share/cacti/poller.php > /dev/null 2>&1
[root@cacti ~]#
Now we need to Run Cacti Installer Setup
Finally our Cacti is ready, just go to http://YOUR-IP-HERE/cacti/ & follow the installer instruction through the following screens. Click Next button.
Accept the license and click on begin to start installation.
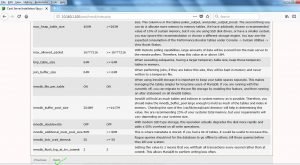
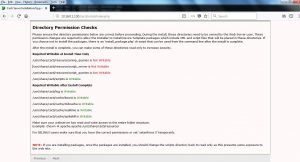
Check if any warning, we need to correct them. Then we need to click on Next.
select New Primary Server and click on Next.
Click on Next
Click on Next
Check all box and click on Finish After that you will get log windows of cacti. Cacti default login user name and password is (admin/admin). Login with this username and password. After that you will get the new windows like below. Where you have to set your new password for cacti.
Enter your New password which you want to set. Then click on save. After that you will successfully login into cacti like below.
How to Add Graphs in cacti
Now we have to go to Management –> Device –> Select Device –> Select Place on a Tree –> Go
Click on Go after that you will get one new windows like below.
Click on continue and finish. After that you have a successfully graph created.
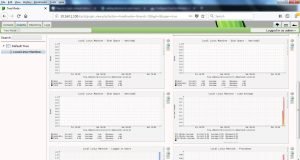
To display the graph we have to click on Graph –> Default Tree –> Choose Your Device then you will get your graph like below.
Thant’s all we have successfully install cacti on CentOS 7 and RHEL 7. Your views and comments are most welcome.


Keep this going please, great job!
Your means of describing all in this post is trulygood, all be capable of simply understand it, Thanks a lot.
A big thank you for your blog article.Thanks Again. Want more.
Wow, amazing blog layout! How long have you been blogging for? you made blogging look easy. The overall look of your site is great, let alone the content!
I think the admin of this web site is truly working hard for his website, as here every data is quality based material.
This information is priceless. How can I find out more?
WONDERFUL Post.thanks for share..extra wait .. …
Hello to every , since I am actually eager of reading this weblog’s post to be updated regularly.
It carries nice stuff.
I and also my pals came looking through the good key points on your web page then the sudden I got a horrible suspicion I never expressed respect to the web site owner for those techniques. The men were definitely for this reason thrilled to read all of them and have very much been tapping into these things. Many thanks for getting considerably considerate as well as for making a choice on such perfect areas millions of individuals are really eager to learn about. My honest apologies for not expressing appreciation to earlier.
Thanks a lot dear for your lovely appreciation.
Best Regards
Zafar
I am not that much of a internet reader to be honest but your blogs really nice, keep it up! I’ll go ahead and bookmark your site to come back later on. Cheers
Excellent post. I certainly love this site. Continue the good work!
It’s best to take part in a contest for probably the greatest blogs on the web. I’ll recommend this site!
Hello! I’ve been reading your blog for some time now and finally got the courage to go ahead and give you a shout out from Atascocita Tx! Just wanted to mention keep up the good job!
We absolutely love your blog and find almost all of your post’s to be exactly what I’m
looking for. Would you offer guest writers to write content in your case?
I wouldn’t mind producing a post or elaborating on a few of the subjects you write related to here.
Again, awesome site!
I like reading a post that will make people think. Also, many thanks for allowing me to comment!
Saved as a favorite, I really like your blog!
Hi there mates, fastidious article and nice arguments commented at this place, I am truly enjoying by these.
This is a topic that’s close to my heart… Take care! Exactly where are your
contact details though?
Wow, marvelous blog layout! How long have you been blogging for? you make blogging look easy. The overall look of your site is magnificent, as well as the content!
I’m not sure where you are getting your info, but great topic.
I needs to spend some time learning more or understanding more.
Thanks for wonderful info I was looking for this
info for my mission.
Amazing! This blog looks exactly like my old one! It’s a totally different topic but it has pretty much the same page layout and design. Outstanding choice of colors!
I just like the valuable info you supply on your articles.
I will bookmark your blog and check again here regularly.
I am quite sure I’ll be told many new stuff right right here!
Best of luck for the following!
Hi there, I enjoy reading all of your article post.
I wanted to write a little comment to support you.
I am actually thankful to the owner of this site who has shared this wonderful piece of writing at at this
time.
Unquestionably believe that which you stated. Your favorite justification seemed to be on the internet the simplest thing to be aware of. I say to you, I certainly get annoyed while people think about worries that they just don’t know about. You managed to hit the nail upon the top and also defined out the whole thing without having side-effects , people can take a signal. Will probably be back to get more. Thanks
Howdy! I’m at work surfing around your blog from my new iphone 3gs! Just wanted to say I love reading through your blog and look forward to all your posts! Carry on the outstanding work!|
An interesting discussion is worth comment. There’s no doubt that that you should write more about this topic, it may not be a taboo subject but usually folks don’t speak about these topics. To the next! Best wishes!!
What’s Going down i’m new to this, I stumbled upon this I’ve found It absolutelyhelpful and it has helped me out loads. I hope to give a contribution & aid different userslike its helped me. Good job.
I value the article post.Really thank you! Cool.
https://henry-packard.wixsite.com/blog
Everything is very open with a clear description of the issues.
It was really informative. Your site is useful. Many thanks for sharing!