In this tutorial we will see how to create and configure self-signed SSL certificates for apache on Linux? What are Self-singed SSL certificates and why we need Self-signed SSL certificates?
What is Self-Signed SSL Certificate?
Self-signed certificate is an identity certificate that is signed by the same entity whose identity it certifies. This term has nothing to do with the identity of the person or organization that performed the signing procedure. In this technical term a self-signed certificate is one signed with its own private key.
For more details you can Click-Here
Why we need self-signed SSL certificate for Apache?
Self-signed certificate will encrypt communication between your server and any clients. It is not signed by any of the trusted certificate authorities included with web browsers, users cannot use the certificate to validate the identity of your server automatically.
Let’s start self-signed SSL creation and configuration
Packages installation
We need to be installed mod_ssl and openssl package, so let’s start this packages installation with yum tool.
[root@urclouds ~]# yum install mod_ssl openssl
Certificate Generation
After packages installation we need to be generate self-signed SSL certificate with below commands, where you must provide your key file name and certificate file name. At the time of certificate generating you must fill information as per your environment. Like below: –
[root@urclouds ~]# openssl req -x509 -nodes -newkey rsa:2048 -keyout urclouds.com.key -out urclouds.com.crt
Generating a 2048 bit RSA private key
........+++
........................................................................................+++
writing new private key to 'urclouds.com.key'
-----
You are about to be asked to enter information that will be incorporated
into your certificate request.
What you are about to enter is what is called a Distinguished Name or a DN.
There are quite a few fields but you can leave some blank
For some fields there will be a default value,
If you enter '.', the field will be left blank.
-----
Country Name (2 letter code) [XX]:IN
State or Province Name (full name) []:Delhi
Locality Name (eg, city) [Default City]:Delhi
Organization Name (eg, company) [Default Company Ltd]:urclouds
Organizational Unit Name (eg, section) []:tech-blog
Common Name (eg, your name or your server's hostname) []:10.255.246.221
Email Address []:admin@urclouds.com
[root@urclouds ~]#
Create a Certificate directory and move .key file and .cert file in certificate directory.
After successfully certificate generation, we need to be created certificate directory and, we need to be copied our certificate file in certificate directory. Like below: –
[root@urclouds ~]# pwd
/root
[root@urclouds ~]#
[root@urclouds ~]# ls -l
total 191508
-rw-r--r--. 1 root root 355 May 5 12:41 1
-rw-------. 1 root root 1225 Apr 9 14:15 anaconda-ks.cfg
-rw-r--r--. 1 root root 1432 May 7 20:47 urclouds.com.crt
-rw-r--r--. 1 root root 1708 May 7 20:47 urclouds.com.key
[root@urclouds ~]#
[root@urclouds ~]# cp -rp urclouds.com.crt /etc/pki/tls/certs/
[root@urclouds ~]# cp -rp urclouds.com.key /etc/pki/tls/certs/
[root@urclouds ~]#
Configure Apache server to run on SSL (HTTPS)
Now we need to be configured apache server to use self-signed SSL certificate. We must create VirtualHost file and fill all related information like ServerName, ServerAlias and SSL certificate key path and SSL certificate file path. Apart from this information you can fill all information as per your environments. Like below: –
[root@urclouds conf.d]# cat /etc/httpd/conf.d/nextcloud.conf
<VirtualHost *:443>
    ServerName 10.255.246.221
    ServerAlias 10.255.246.221
    SSLEngine on
    SSLOptions +StrictRequire
    SSLCertificateFile /etc/pki/tls/certs/urclouds.com.crt
    SSLCertificateKeyFile /etc/pki/tls/certs/urclouds.com.key
</VirtualHost>
Start HTTPD service
After Apache server configuration we need to be start httpd service with below commands: –
[root@urclouds conf.d]# systemctl start httpd
Check HTTPD service status
We can check apache server running status with below commands: –
[root@urclouds conf.d]# systemctl status httpd.service
● httpd.service - The Apache HTTP Server
Loaded: loaded (/usr/lib/systemd/system/httpd.service; enabled; vendor preset: disabled)
Active: active (running) since Sun 2019-05-12 10:54:18 CEST; 7s ago
Docs: man:httpd(8)
man:apachectl(8)
Process: 14268 ExecStop=/bin/kill -WINCH ${MAINPID} (code=exited, status=0/SUCCESS)
Process: 14038 ExecReload=/usr/sbin/httpd $OPTIONS -k graceful (code=exited, status=0/SUCCESS)
Main PID: 14273 (httpd)
Status: "Processing requests..."
CGroup: /system.slice/httpd.service
├─14273 /usr/sbin/httpd -DFOREGROUND
├─14274 /usr/sbin/httpd -DFOREGROUND
├─14275 /usr/sbin/httpd -DFOREGROUND
├─14276 /usr/sbin/httpd -DFOREGROUND
├─14277 /usr/sbin/httpd -DFOREGROUND
└─14278 /usr/sbin/httpd -DFOREGROUND

May 12 10:54:18 urclouds systemd[1]: Starting The Apache HTTP Server...
May 12 10:54:18 urclouds httpd[14273]: AH00558: httpd: Could not reliably determine the server's fully qualified domain name, using 10.255.246.221. Set the 'ServerNa...this message
May 12 10:54:18 urclouds systemd[1]: Started The Apache HTTP Server.
Hint: Some lines were ellipsized, use -l to show in full.
[root@urclouds conf.d]#
Now check self-signed SSL certificates
You can see above output our apache service is successfully started. Now we can go to browser and type our IP (https://your-server-IP) to checking our self-singed certificate are properly configured or not?
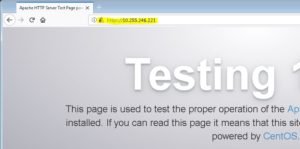
You can see our apache service is successfully open on https 443 port through browser.
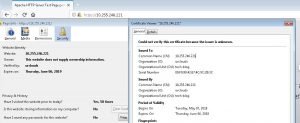
Now we can check self-signed SSL certificate status. You can see in below snapshot our Self-signed SSL certificate are successfully configured on apache.
That’s all we have successfully created and configured self-signed SSL certificate for apache server in Linux.
Your ideas should be accepted and normal for all.